

And Lo a Star
- Stacey

- Dec 18, 2020
- 3 min read
"...and, lo, the star, which they saw in the east, went before them, till it came and stood over where the young child was." -Matthew 2:9
With a nativity themed Christmas tree a star was needed. I have the main star as a topper of course but I felt like I needed a few more stars on my tree.
I found these really cute stars on #pinterest but I am cheap, resourceful, and I like to spend my money on things other than ornaments. So I made my own!
I used cardboard, twine, hot glue, a candle, an Exacto knife, scissors, and gold spray paint.
I began by tracing circles (I used cups and bowls) on cardboard. By using a circle you can create stars that are the same size and shape. I am too lazy to put in the effort to measure each point of the star so my stars are not all perfect stars. In fact, none of them are perfect stars, but I love the character that odd-shaped stars have.
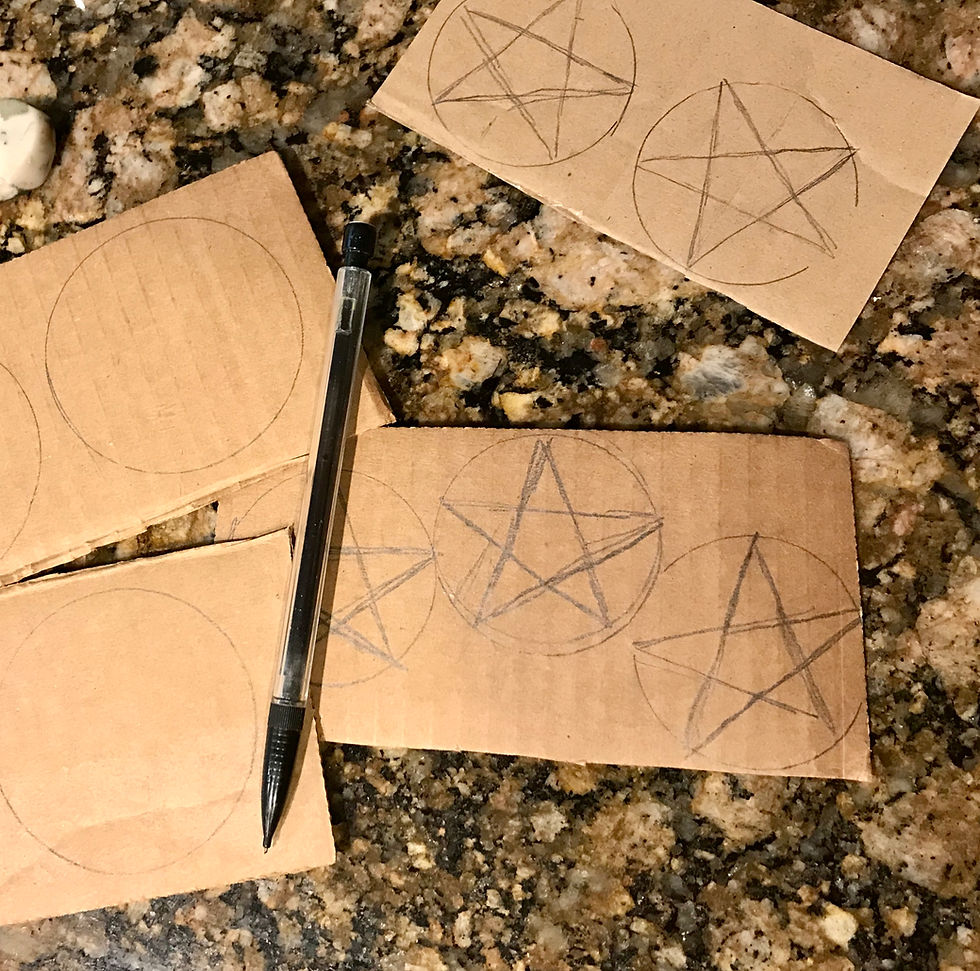
Using scissors I cut out my stars. On a few of the stars, I cut out the centers using an Exacto knife.

I made four larger stars and five smaller stars and four of them have cut out centers. I wanted two different sizes to give some variety and interest to the look of the Christmas tree.

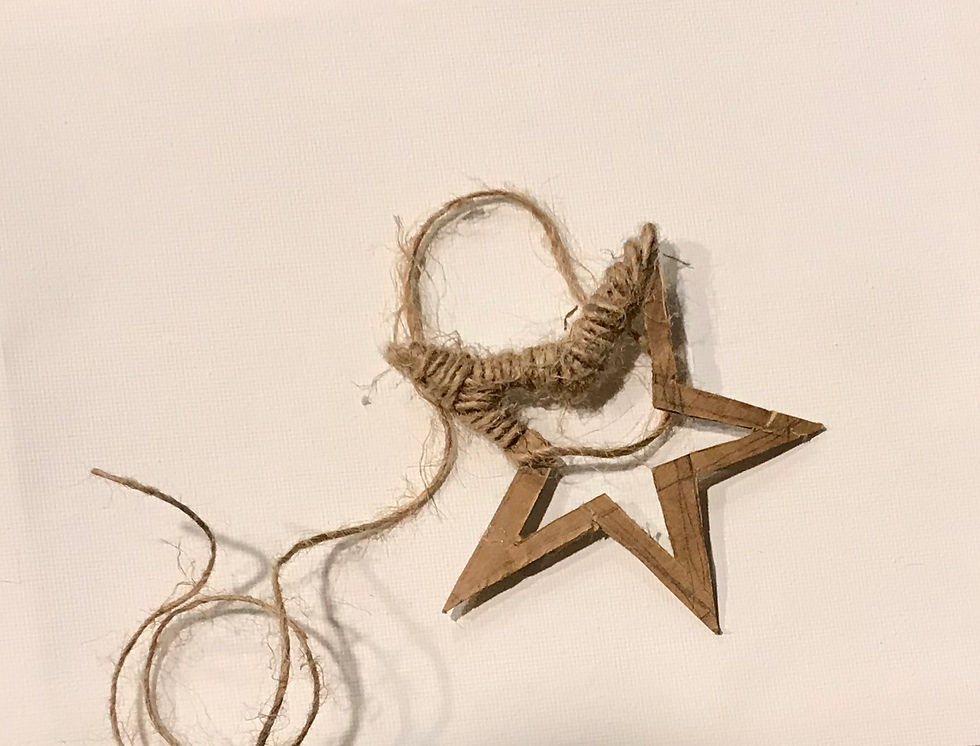
Next came the hard part. I used twine that I found at the #dollartree (they come in packs of three), and wrapped each star in it. The first star that I did took me like 45 minutes. Once I figured out the best system in wrapping the stars, it took a lot less time.
I was able to wrap two and a half stars before I ran out of twine (I only had a little left). I bought more twine the next day and I bought enough to make sure I wouldn't run out again! I wanted to make sure I would have enough for all the stars and maybe future projects. I ended up using almost 3 rolls of twine from the Dollar Tree to make 10 stars.
After wrapping the stars the twine had become very fuzzy. I didn't want them to look trashy so I pulled out a candle and burned all the fly-away fibers off. This was actually a lot more dangerous than I expected. The whole star would ignite because of all the fibers. I had to watch my fingers and keep my lungs at the ready to blow it out. Worth it!

Look at how clean it looks after I burned my fingers, I mean the star! I have to admit, I like playing with fire. I am really pleased with the outcome.

Half of the stars and then lightly spray painted gold. I only wanted a hint of gold on them. Then I attached a red ribbon to each star. I hot glued the ribbon on the flat of the star so when you hang them up the star doesn't twist sideways.

I cannot wait until Christmas! I am so excited to see how everything looks on the tree. These stars cost me $3 (I had the ribbon and spray paint already) and took me 4 hours to make. I think it was worth it!


Comments